24/7 Emergency Roof Repair — Weehawken, NJ(201) 330-4743
Union City Roof Repair Call (201) 330-4743

Dormer Repair in Weehawken, NJ

Dormer leaks, failed step flashing, and water-stained dormer walls need proper repair — not another bead of sealant. Dormer leak and flashing repair services for Weehawken homes, from cheek sidewalls to kick-out diverters.

  • Dormer-specific repairs — step flashing, kick-out flashing, apron flashing, and siding transitions
  • Waterfront-aware methods — metal and fastener choices suited to Hudson River exposure
  • Emergency calls answered 24/7 — active dormer leaks get urgent attention
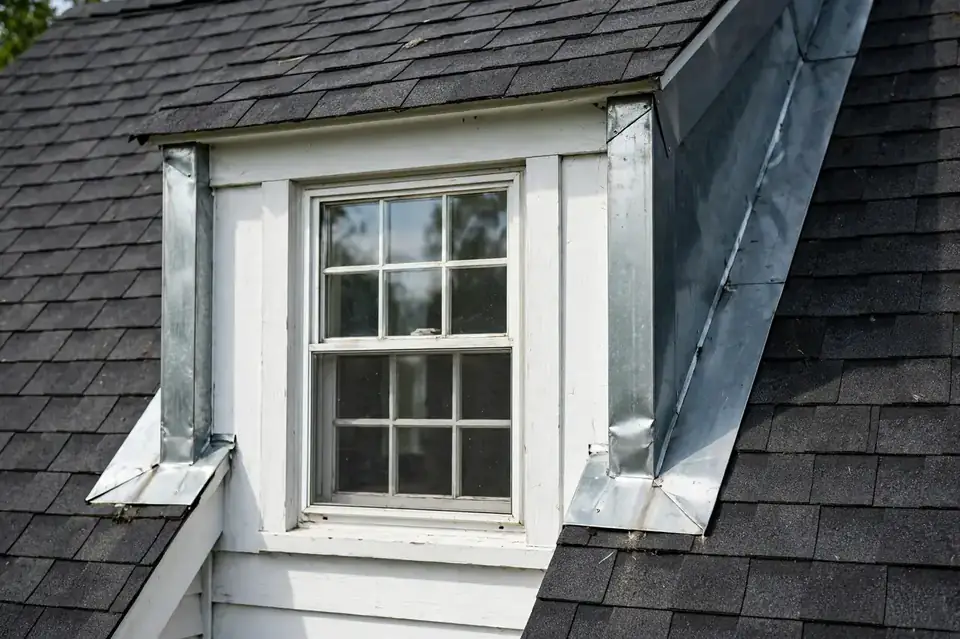
Dormer flashing repair on a Weehawken NJ home
Illustrative roofing image — not an actual customer project.

Dormer Leak and Flashing Repair Solutions

Dormer repair starts with the flashing assembly — every joint where the dormer meets the main roof:

Step Flashing Rebuild

Corroded step flashing along both dormer cheeks removed and replaced, woven piece by piece with each shingle course — the core of most dormer leak repairs.

Kick-Out Flashing

Diverters installed or replaced where sidewalls meet the roofline, so concentrated runoff leaves through the gutter instead of running down the wall.

Apron Flashing Repair

The flashing across the dormer front — the face that takes weather head-on — rebuilt and resealed where it meets the main roof slope.

Siding Transition Repair

The joint where dormer sidewalls meet roofing opened, reflashed, and reintegrated so water can't slip behind the siding.

Cheek Sidewall Repair

Dormer sidewall surfaces repaired where moisture has damaged them, with the underlying flashing corrected at the same time.

Concealed Rot Repair

Sheathing or framing damaged by long-running leaks replaced once the dormer is opened — rot found during repair gets fixed, not covered.

Warning Signs Around Dormer Walls and Roofs

Stains near — rarely under — the dormer

Discoloration on interior walls offset from the dormer itself. May indicate: water entering at the flashing and traveling the wall cavity. Next step: note the stain's position relative to the dormer before calling.

Rust streaks below the cheeks

Orange-brown streaks bleeding onto shingles under the dormer sidewalls. May indicate: fasteners or flashing edges corroding through. Next step: corroded metal needs replacing, not painting over.

Swollen or soft dormer trim

Trim on the cheeks or front that feels soft or looks swollen. May indicate: moisture saturating woodwork from behind. Next step: the trim is the symptom — the flashing behind it is the cause.

Water streaking down siding

Streaks on siding directly beneath the dormer. May indicate: a missing or failed kick-out diverter letting runoff pour down the wall. Next step: check whether a diverter exists at the sidewall base.

Pitted or powdery flashing metal

White residue or pitting on visible flashing edges. May indicate: protective coatings breaking down — the earliest visible warning. Next step: have the full assembly checked, not just the visible edge.

Leaks returning after sealant fixes

The same dormer leaking again after being sealed. May indicate: the metal underneath is failing — sealant can't save corroded flashing. Next step: ask for the flashing to be assessed, not resealed.

Step Flashing, Kick-Out and Siding Transitions

The three details that decide whether a dormer stays dry:

Step flashing

Individual L-shaped pieces woven alternately with each shingle course up both cheeks. Each piece laps the one below so water steps down and out. Reuse of old step flashing during a repair is false economy — once the courses are opened, the metal gets replaced.

Kick-out diverters

A bent flashing piece at the bottom of each sidewall that kicks concentrated runoff into the gutter. Many older dormers never had them. Without one, years of runoff pour down the wall and rot everything it touches.

Apron flashing

A continuous piece across the dormer front, lapped under the siding above and over the shingles below. The front takes weather head-on, so its seal and fastening get checked first.

Metal compatibility

Aluminum resists waterfront air well but must be isolated from steel fasteners — dissimilar metals in salt air corrode galvanically. Copper is the long-life option. Stainless steel fasteners throughout: standard nails rust out and loosen the flashing they hold. Sealant is the gasket behind properly lapped metal — never the repair itself.

Scope limits: flashing repair addresses the water entry. If opening the dormer reveals rotted framing or structural damage beyond the sheathing, that work is scoped separately — it's priced and agreed before proceeding, not discovered on the invoice.

Dormer Repair Considerations for Weehawken Properties

  • Hudson waterfront exposure — salt-laden air settles on every roof in town and works on flashing metals and fasteners. Metal specification matters more here than inland: what the flashing is made of sets how long the repair lasts.
  • West-side capes — the classic dormer stock: older homes, often with original flashing from eras before kick-out diverters were standard. Missing diverters are common and worth checking on every one of these.
  • Waterfront mid-rises — dormers several stories up, where access and staging are a real part of the job's logistics and planning.
  • Wind-driven rain off the river — pushes water sideways into cheek joints that would shed calm rain without trouble. Eastern exposures take the most direct weather.
  • Older flashing assemblies — galvanized steel and standard nails from earlier installations are the combination waterfront air attacks first; expect the full assembly to be on a similar timeline.

When Dormer Damage Becomes an Emergency in Weehawken

Dormers punch valleys and sidewalls through the main roof — joints that handle a lot of water. Most dormer wear is schedulable; wind-lifted shingles or open valleys around a dormer are not.

Weehawken's riverfront blocks take driving wind head-on; flashing and ridge lines are the first details to check after a storm.

  • Water at the dormer window — drips at the window head or damp drywall below the dormer mean the valley or cheek flashing has failed. On Weehawken's riverfront, windward sides wear fastest.
  • Lifted shingles around the dormer — wind catches dormer edges first; bare patches channel water straight into the joint. Weehawken's Hudson gusts hit hardest from the east — start your check there.
  • Staining spreading down the wall — water entering at a dormer can run inside the wall before it shows — treat spreading stains as urgent. Coastal storms rake Weehawken's exposed blocks; check after every one.
  • Windward dormer cheeks — Weehawken's riverfront gusts rake dormer sidewalls; lifted cheek flashing shows up as stains below the dormer.

On the Weehawken riverfront, the next gust is always coming: Emergency help →

Need Dormer Repair in Weehawken?

Dormer leaks get worse, not better — water keeps traveling while the flashing keeps failing. Call to discuss dormer repair options in Weehawken.

Call (201) 330-4743

How Dormer Repair Is Scoped

How a dormer repair typically moves from problem to fix:

1

Inspection

Dormer flashing, fasteners, and surrounding roofing are examined — plus the interior staining, since tracing the water path is half the job.

2

Findings

What's actually failing is identified: which flashing pieces, what the water reached, whether the metal or just the seal gave out.

3

Scope & Estimate

The repair scope is defined — metal specification, which details are included, what hidden damage would expand it. Agreed before work starts.

4

Agreed Work & Checks

Failed flashing is replaced, surfaces reintegrated in correct lap order, and the repaired transitions are water-tested.

Localized Reflashing vs Dormer Rebuild

Most dormer leaks are flashing failures, not structural failures. The metal's condition across the whole assembly — visible only once the transitions are opened — decides which applies:

Localized reflashing may be suitable

  • One cheek's flashing failed; the rest tests sound
  • Apron flashing only, with step flashing intact
  • Kick-out diverter missing but surrounding metal sound
  • No rot found in sheathing once opened

Broader work may be needed

  • Step flashing failing across both cheeks and apron
  • Concealed rot in sheathing or framing discovered on opening
  • Repeated failures at already-repaired details
  • Dormer structure itself compromised by long-term water entry

A full dormer rebuild is a structural project, not a flashing repair — it's only on the table when the evidence supports it, and it's scoped and priced as its own job.

Dormer Repair Cost Factors

No invented prices — but these are the factors that set the real number:

Extent of flashing replaced

One cheek versus the full assembly — step, apron, and kick-outs together.

Metal & fastener specification

Galvanized, aluminum, or copper with stainless fasteners — a real cost ladder that also sets the repair's lifespan.

Hidden damage on opening

Sound sheathing versus rot found once the transitions are opened — invisible until then.

Building height & access

A west-side cape versus a waterfront mid-rise — staging and safe access change the job.

Surface reintegration

Shingles and siding removed to reach the flashing go back in correct lap order — that finishing work is part of the scope.

Emergency vs. scheduled

Urgent weatherproofing costs more than planned work. A firm figure only exists after the dormer is inspected.

Weehawken Dormer Repair FAQs

Why does dormer flashing fail faster near the Hudson?

Salt-laden air settles on exposed metal, and each wet-dry cycle attacks protective coatings — galvanized steel loses its zinc layer, then the steel corrodes. Fasteners usually go first, then flashing edges. That's why the metal specification matters on waterfront jobs.

My dormer was sealed twice and still leaks. Why?

Sealant was never the problem — the metal underneath was. Sealant over corroded, pitted flashing buys time while water keeps finding the gaps. Two failed sealant jobs is the classic signal the flashing needs replacing, not resealing.

What metal should be used for a Weehawken dormer?

Aluminum is the common waterfront upgrade over galvanized steel, provided it's isolated from dissimilar metals. Copper is the long-life option. Either way, stainless steel fasteners — standard nails rust out in salt air and loosen the flashing.

Does the river side corrode faster?

Generally yes — eastern exposures take the most direct salt spray and wind-driven rain. But salt air reaches the whole town, so a sheltered dormer still ages faster than it would inland. The inspection should cover all the dormer's flashing, not just the river-facing cheek.

Will the new flashing look different?

Properly installed flashing is almost entirely hidden — woven under shingles and behind siding, with only thin edges visible. What you'll see after reintegration is essentially what you saw before, minus the rust streaks. The difference is underneath.

How urgent is a dormer leak?

More urgent than it looks. Water entering at a dormer travels through wall cavities, soaking sheathing, framing, and insulation far from the entry point. What starts as a stain can become rot. If water is actively coming in, it needs attention now — not next season.

Need Dormer Repair in Weehawken, NJ?

Leaking dormer, failed flashing, or water stains spreading down the wall — call now to discuss dormer repair options for your Weehawken home.

Call Now — (201) 330-4743

24/7 emergency roof repair calls answered; regular service appointments are scheduled.

☎ Call (201) 330-4743