Dormer leaks, failed step flashing, missing kick-out diverters, and rotted dormer cheeks need timely attention. Professional dormer repair services for North Bergen homes — from localized reflashing to full perimeter flashing replacement.

Most dormer problems are flashing problems. These are the repairs that actually fix them:
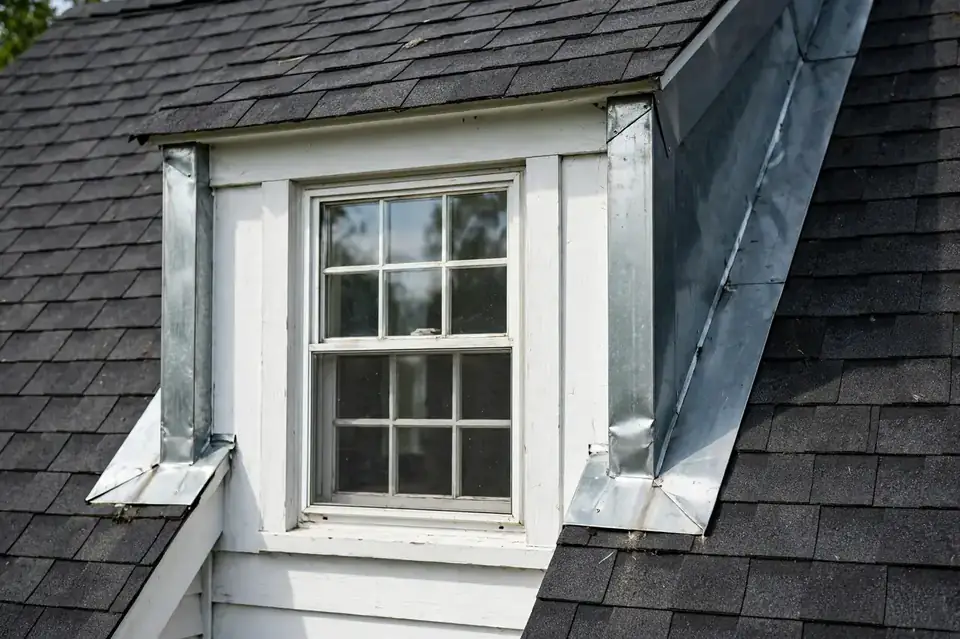
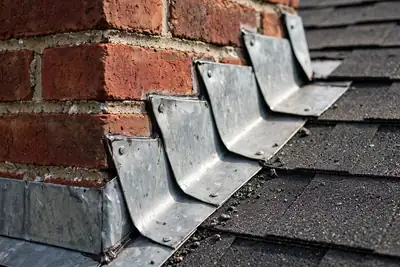
Failed step flashing along dormer cheeks is removed and re-woven course by course — each L-shaped piece overlapped with the shingle course below so water sheds over, never behind.
Missing diverters at the sidewall-to-roof junction are installed or corrected, throwing runoff into the gutter instead of letting it pour down the wall and behind the siding.
The flashing spanning the dormer’s front base is replaced and tucked properly under the siding — face-sealed aprons that have cracked and lifted are a classic leak source.
Siding that laps incorrectly over flashing gets corrected, and deteriorated trim is addressed so the wall-to-roof transition sheds water the way it should.
The transition where the dormer’s own small roof meets the main slope is re-flashed and sealed — a joint that concentrates water flow and fails early when detailed poorly.
Rotted sheathing or framing found under failed flashing is replaced within the repair scope. Structural rebuilding beyond the weather envelope is not assumed — the inspection determines the extent.
Water travels inside the wall cavity before surfacing. What it may indicate: a failed flashing detail, not a hole above the stain. Next step: have the dormer’s flashing transitions inspected, not the stained ceiling.
Moisture working outward through the wall assembly. What it may indicate: step flashing losing its seal along the cheek. Next step: check where flashing meets the cheek for gaps or lifted edges.
Trapped moisture in insulation or framing. What it may indicate: a slow, long-running leak rather than a new one. Next step: interior evidence should be part of the inspection.
Visible separation or staining where metal meets wall. What it may indicate: corroded or displaced flashing pieces. Next step: these joints rarely reseal themselves — get them assessed.
Runoff pouring down the wall under the dormer. What it may indicate: a missing or failed kick-out diverter. Next step: the diverter detail should be checked at the sidewall base.
Leaks that appear when rain comes in sideways. What it may indicate: flashing that holds in calm weather but fails under wind pressure. Next step: mention the wind connection — it narrows the diagnosis.
Dormer flashing is usually aluminum (rust-resistant, easy to form) or galvanized steel (tougher, but vulnerable once its zinc coating wears). The details that matter:
Individual L-shaped pieces interleaved with each shingle course, overlapping like scales. Weaving means gravity carries water over the next layer down — never behind it. Shortcuts here are the leading cause of dormer leaks.
Caps the top edge where flashing meets the wall, keeping water from getting behind the step flashing. Must be compatible with the metal below — dissimilar metals in contact corrode through galvanic action.
Small angled pieces at the sidewall-to-roof junction that throw runoff into the gutter. Tiny, inexpensive, and missing on a surprising share of older dormers. Every proper re-flash includes one.
Siding must lap over the flashing in the correct order. When siding channels water behind the metal — or flashing was face-nailed over siding instead of tucked under — the transition fails regardless of flashing quality.
Realistic limits: reflashing fixes flashing failures. If the inspection reveals framing damage from years of hidden leakage, the scope may extend to re-flashing the full perimeter — but structural rebuilding is never assumed upfront.
Dormers punch valleys and sidewalls through the main roof — joints that handle a lot of water. Most dormer wear is schedulable; wind-lifted shingles or open valleys around a dormer are not.
Across North Bergen's mix of homes and low-rise commercial buildings, flat and low-slope sections fail first — check them after every storm.
In North Bergen, check flat sections first — then call before the next rain: Emergency help →
Dormer leaks rarely fix themselves — and the stain marks the exit, not the entry. Call to discuss repair options for your dormer.
Call (201) 330-4743No guaranteed method or timeline — but a competent dormer repair follows this shape:
The dormer’s flashing transitions are opened and examined — step flashing, apron, kick-outs, siding laps — along with interior evidence mapping the water’s path.
What’s failed, what’s sound, and what was found underneath. A repair quoted without opening the transition is a guess.
Which flashing pieces get replaced, whether a kick-out diverter is included, how shingles and siding will be reintegrated — agreed before work starts.
The repair is completed with proper lapping and fastening, then the water path is verified and surrounding details checked.
Most dormer problems are flashing problems, and flashing is repairable. The inspection decides which of these applies:
A firm scope only exists after the transition is opened. Treat any fixed quote given before that as provisional.
No invented price ranges — but these are the factors that set the real number:
One cheek versus the full perimeter — the amount of metal and labor involved.
Sound sheathing versus rotted framing discovered on opening — invisible until the transition is exposed.
Steep slopes, height, and tight lots add labor — North Bergen’s hillside properties can complicate staging.
Disturbed shingles and siding need compatible replacements; older materials are harder to source.
Drywall, insulation, or trim affected by the leak may need separate attention beyond the flashing repair.
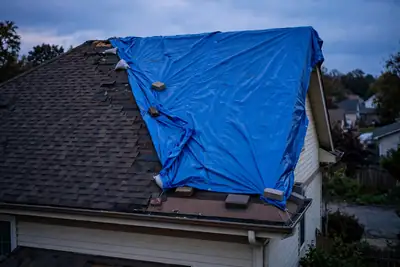
Urgent tarping and dispatch cost more than planned repair work.
Water enters at the failed flashing, then travels inside the wall cavity until gravity pulls it out somewhere visible. The stain marks the exit, not the entry. Finding the breach requires inspecting the dormer's flashing transitions — not the stained ceiling.
Sealant can buy time on a minor gap, but a proper repair requires opening the transition — removing surrounding shingles and siding to replace the failed metal underneath. Sealant over failed flashing is a temporary patch, not a repair.
A small angled flashing piece where the dormer sidewall meets the roof, throwing runoff into the gutter instead of down the wall. Many older dormers never got one. Any proper re-flash should include one.
More urgent than it looks. Dormer leaks travel inside wall cavities, so visible damage understates the real extent — framing and insulation can be deteriorating unseen. At minimum, an active leak needs prompt assessment and temporary protection.
The flashing itself is hidden once reintegrated, so matching matters most for disturbed shingles or siding. Ask how material matching is handled before authorizing — exact matches are harder to source on older roofs.
It's sensible. Chimney and dormer flashing are often the same age and fail on similar timelines, and flashing work already set up on the roof can cover both in one visit rather than two.
It depends on the scope: how much flashing is replaced, what's found underneath, accessibility, and material matching. No honest number exists before the transition is opened and inspected — be cautious of anyone who quotes sight unseen.
Which flashing pieces are being replaced, whether a kick-out diverter is included, how shingles and siding will be reintegrated, and what happens if rot is found underneath. Get the scope in writing before work starts.
Dormer leak, failed flashing, or water showing up where it shouldn’t — call now to discuss dormer repair options for your North Bergen home.
Call Now — (201) 330-474324/7 emergency roof repair calls answered; regular service appointments are scheduled.